How to increase storage space of AWS EC2 instance
AWS uses EBS, Elastic Block storage as storage to your server.
You can assign various types of storage for your server,
for example:
– HDD (Hard disk drive)
– SSD (Solid disk drive)
– previous generation
For best performance, your default option is SSD, and most people go with that type of storage.
When you launch AWS EC2 instance, you are asked for the type of storage and size. At this point of time, you should always select the lowest required storage, because it can be increased later but can not be decreased, Resulting, if it is not in use, then also you will have to pay for it each month.
In this article, we will see how to increase storage after launching your server. As and when required.
There are 2 methods, one requires a reboot and is mostly for non-technical/non-DevOps persons. While you reboot, your machine, you will get certain seconds/minutes of downtime.
The second one involves commands to be fired, in order to increase storage space, but don’t have any downtime of server
Let’s look at those.
prerequisite
- This article is for SSD type of AWS EBS volumes
- This article is for Ubuntu OS
- You should be using ext4 file system for this
AWS EBS volume cannot be decrease after it is increased.
Thus, only increase required volume to avoid access charges
1. Increase EBS size from AWS Console
- Log in to AWS Console
- Click on Services and Select EC2
- Select instance for which we need to increase root storage
- Go to storage tab from center bottom panel
- Inside Block device, select root block device, which needs increase in storage space
- Click on Actions -> Modify Volume
- Keep Volume Type as it as, and increase size as per requirement
- Click on modify, and then click on yes

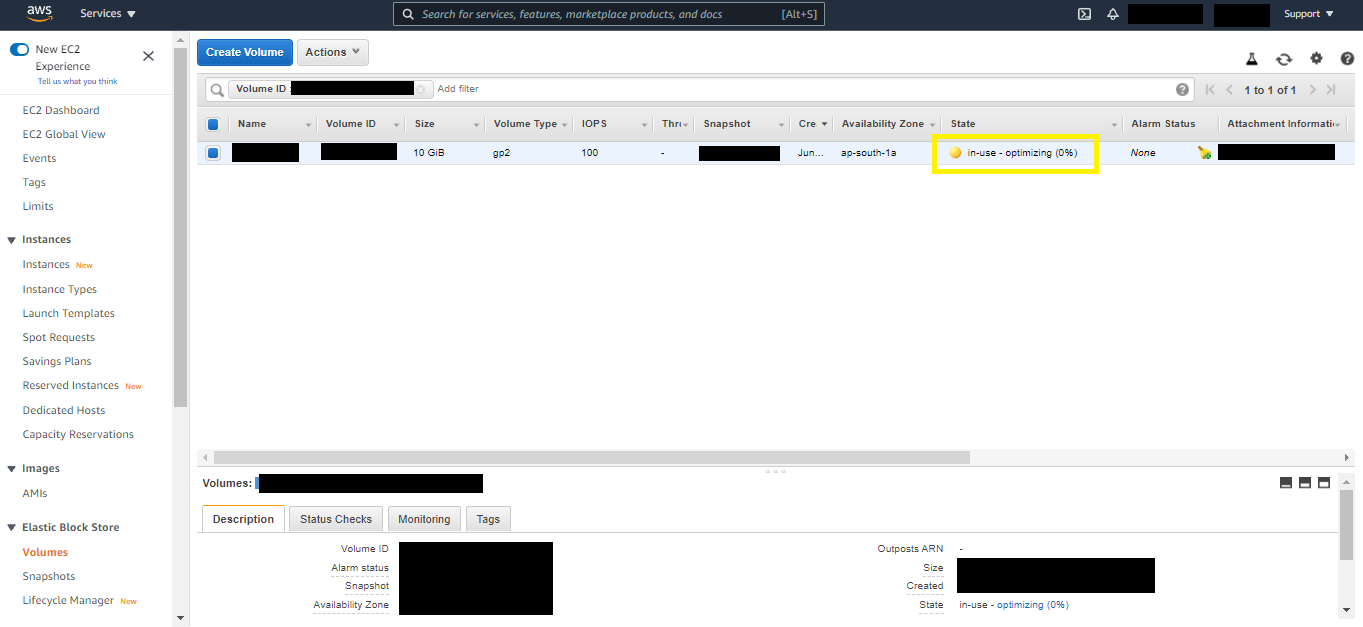
- After doing that, you can see State of modification as in-use – optimizing (0%), Once it reaches to 100%, then you can proceed for next steps.
Note: If You are increasing volume with much gap from before, this process will take time
2. Increase EBS size using reboot (Non-technical way)
- Log in to AWS Console
- Click on Services and Select EC2
- Select instance for which we increased root storage
- Go to Instance State -> Stop instance
- After the instance is stopped successfully, you can go to Instance State -> Start instance
- This way, when the system starts again, remapping of root volume will happen at the kernel level and you will be able to see increase server size
- SSH into server
- Run below-mentioned command to verify new storage size
df -hYou will be able to see increased storage size, if you still see old size, go forward and perform next steps
3. Increase EBS size using commands (Technical way)
- Log in to AWS Console
- SSH into server (Assuming OS type is Ubuntu)
- Run below-mentioned command
lsblk- Verify, if you can see 1 sub part of your main root volume
- Let’s assume your root volume name is xvda
- In this case, you will be able to see xvda1 as sub volume part with increase size

- Now, run below-mentioned commands
- 1st command to increase partition
- 2nd command to make sure now both root partition and sub partition are at same size
sudo growpart /dev/xvda 1
lsblk- Now, for ext4 file systems, run mentioned command
sudo resize2fs /dev/xvda1
sudo resize2fs /dev/xvda- Run below-mentioned command to verify new storage size
df -h- You will be finally able to see increased storage size without reboot.
We hope this article is helpful to you. Do provide your feedback in the comment section below
Drafted On,
22nd January 2022
DevOps @identicalCloud.com
Reference

Thanks for the meaningful article. These commands are very helpful for me