
Automate AMI Creation and Deletion with Amazon Lambda (AWS EC2 Backup)
In our previous article, we have seen How to create AMI automatically daily for your EC2 servers and then delete it after a period of time, but it is important to delete snapshots also after deregistering AMI, if you really don’t need it.
Thus, in this article, we will see an upgraded version of our previous article, where you can Create AMI Automatically, De-register that AMI after a few days, and Delete Snapshot generated with that AMI
- To give a rough idea about what AMI is, AMI stands for Amazon Machine Image
- In this article, we will create AMI of our AWS EC2 instance for backup purposes, with everything that is installed and running on AWS EC2 Server.
For this article, We need to have access to following
- Have a list of EC2 instance IDs (i-xxxxxxxxxxxxxx) which you need to take AMIs
- Permission to create Lambda function, and permission to create IAM Role with Basic Lambda and EC2 Permissions
- EventBridge access to create automatic cron for automatic invocation of Amazon Lambda function Created
1. Create Lambda Function
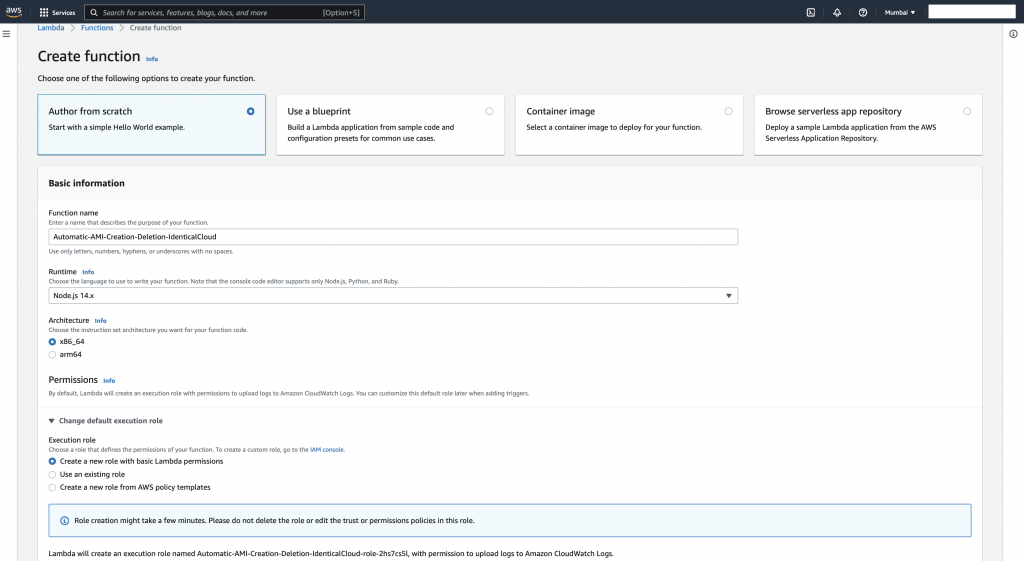
- To create a Lambda function, Go to AWS Lambda, and Select “Author From Scratch”
- Give Function Name “AutoAMI-Create-Delete”
- Select NodeJS Version 14.x (12.x and Above) supported
- In Execution Role, Select “Create a new role with basic Lambda permissions”
- And Keep Everything else as it is, and Click “Create Function”
Now, at the function level, copy below-mentioned code in index.js file
Replace, Instance ID, Name, and Region of the EC2 instance
var AWS = require('aws-sdk');
var DateToday = new Date();
DateToday.setDate(DateToday.getDate())
var date = DateToday.toISOString();
var timestamp = date.substr(0, 10);
console.log('Today: ' , timestamp);

var DatePrevious = new Date();
DatePrevious.setDate(DatePrevious.getDate() - 10)
var dateprev = DatePrevious.toISOString();
var timestamp_prev = dateprev.substr(0, 10);
console.log('<br>1 days ago was: ' , timestamp_prev);


var INSTANCE_SETTINGS = [
    {
       id: 'i-xxxxxxxxxxxxxxxxx',
       name: '$SERVER-IDENTIFICATION-NAME',
       region: '$REGION'
    }

];

exports.handler = function (event, context) {
	for (var index = 0; index < INSTANCE_SETTINGS.length; index++) {
		let currentIndex = index;
		var ec2 = new AWS.EC2({
			apiVersion: '2016-11-15',
			region: INSTANCE_SETTINGS[index].region,
		});

        var ImageNameString = "auto-ami-" + (INSTANCE_SETTINGS[index].name) + "-" + timestamp;
		var params = {
			Description: "Created from Lambda",
			InstanceId: INSTANCE_SETTINGS[index].id,
			Name: ImageNameString,
			NoReboot: true,
		};

		ec2.createImage(params, function (err, data0) {
			if (err) console.log(err, err.stack);
			else console.log(data0);
		});

        var ImageNameToDelete = "auto-ami-" + (INSTANCE_SETTINGS[index].name) + "-" + timestamp_prev;
        console.log("Image name to delete : ",ImageNameToDelete)
        let params_todelete = {}
        params_todelete.Filters = [...PARAMS_TO_DELETE.Filters]
        params_todelete.Owners = ['self'];
        params_todelete.Filters[0].Values = [ImageNameToDelete];

		ec2.describeImages(params_todelete, function (err, data) {
			if (err) console.log(err, err.stack);
			else {
                if(data.Images.length > 0) {
                    var newec2 = new AWS.EC2({
						apiVersion: '2016-11-15',
						region: INSTANCE_SETTINGS[currentIndex].region,
					});
                    newec2.deregisterImage({ ImageId : data.Images[0].ImageId }, function(err, data) {
                        if (err) console.log(err, err.stack); // an error occurred
                        else     console.log("SUCCESS - AMI Deletion");           // successful response
                    });

                    return new Promise(resolve => {
                        setTimeout(() => {
                            newec2.deleteSnapshot({ SnapshotId : data.Images[0].BlockDeviceMappings[0].Ebs.SnapshotId}, function(err, data) {
                                if (err) console.log(err, err.stack);
                                else     console.log("SUCCESS - Snapshot Deletion");
                            });
                        }, 1000);
                    });
                }
            }
        });
	}
};

const PARAMS_TO_DELETE = {
    Filters: [
        {
            Name: 'name',
            Values: [],
        }
    ],
    Owners: ['self']
};
Deploy saved code
Next, edit the following
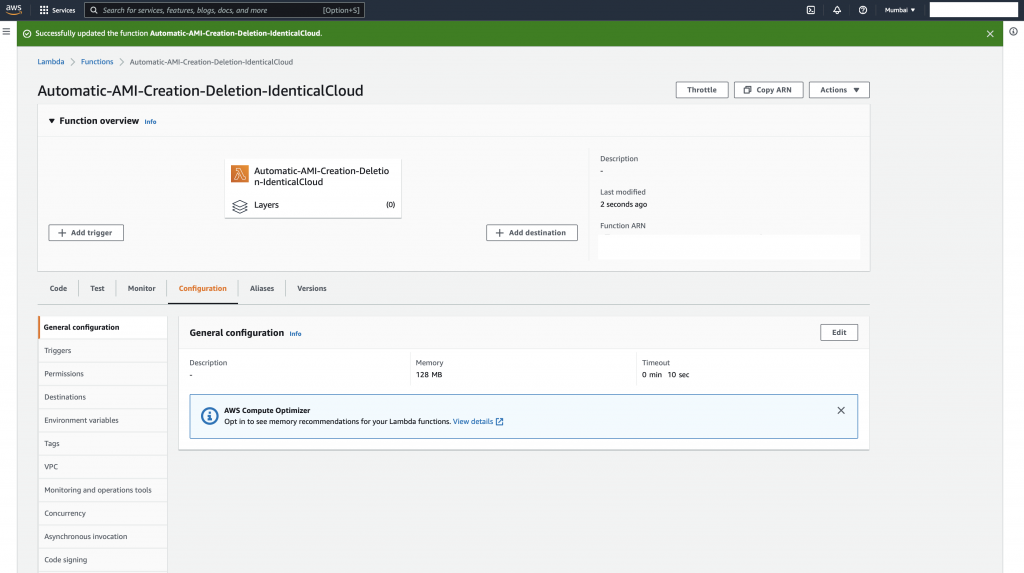
- Go to Configuration -> “General Configuration“, and edit TimeOut, increase it to 10 seconds.
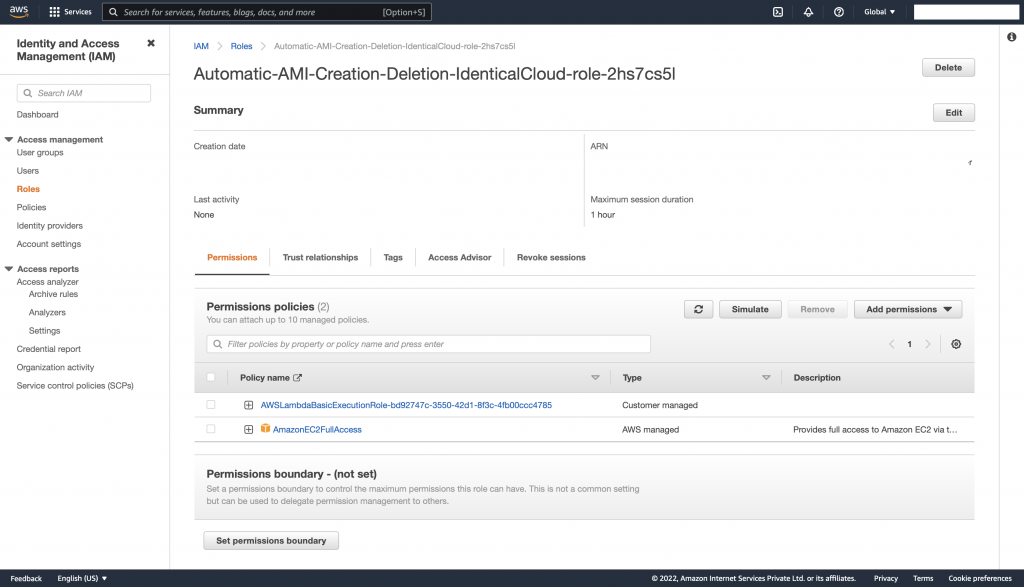
- Go to Configuration -> “Permissions”, and Go to Created Role Name, attach EC2FullAccess Policy to the role. (Or you generate a new policy which has access to EC2, create AMI, List AMI, List Snapshot, De-register AMI and Delete Snapshot)
To include more than one EC2 instance in this automatic AMI procedure, make the below-mentioned changes in the code
var INSTANCE_SETTINGS = [
    {
       id: 'i-xxxxxxxxxxxxxxxxx',
       name: '$SERVER-IDENTIFICATION-NAME',
       region: '$REGION'
    },
    {
       id: 'i-yyyyyyyyyyyyyyyy',
       name: '$SERVER-IDENTIFICATION-NAME',
       region: '$REGION'
    },
    {
       id: 'i-zzzzzzzzzzzzzzz',
       name: '$SERVER-IDENTIFICATION-NAME',
       region: '$REGION'
    }

];
This function is supposed to Create AMI of today’s EC2 and (De-register AMI and Delete Snapshot) which was created 10 days back. You can set a timeframe as per your need
- Now, we will test this event once with basic JSON with no data, and see if our function is working fine
2. Add a trigger to call Lambda function Daily
- We will move on to attach a trigger which can call this function daily automatically, for that we will use AWS Eventbridge Service
Note it here, previously we were using AWS Cloudwatch Rules, in Recent AWS Upgrades, it has been moved to AWS Eventbridge
We will use AWS EventBridge to schedule timings for invoking this lambda function
- Go to Amazon EventBridge, Click on “Rules“
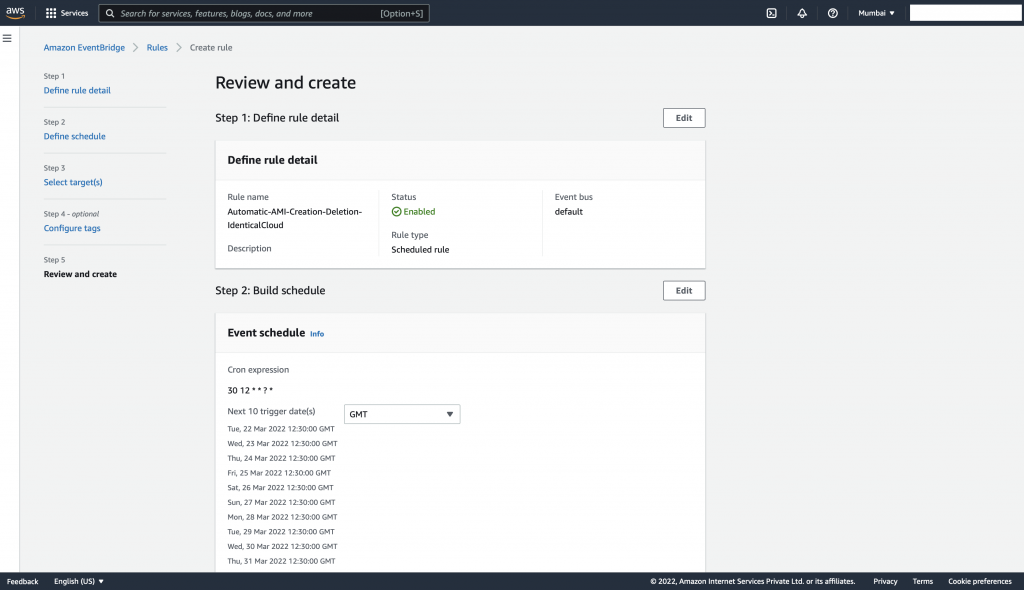
- Create Rule -> Give it proper name and description, At Event Bus, select “default” and rule type is “Schedule”, Go Next
- At Sample Event, place Simple
{ } - At Schedule Event, Set Cron Job for Daily
30 12 * * ? * which means, it will run daily at 12:30 GMT, you can select Local Time Zone as well
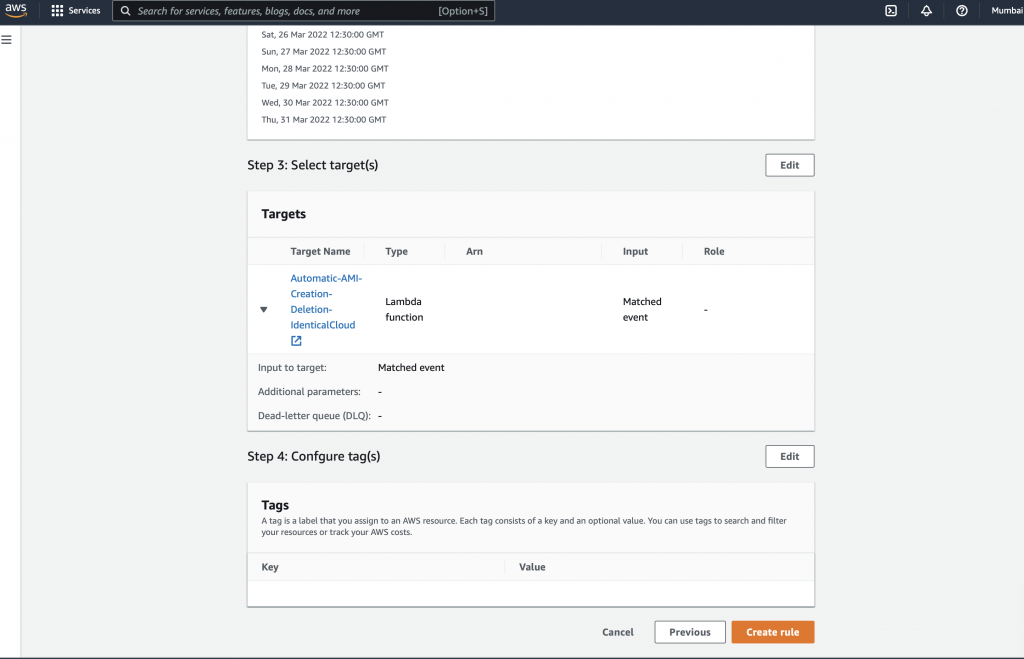
5. Go Next, and select Target, Select “Lambda Function” and Select your Function, keep everything as it is, and Next
6. Add tags (optional)
7. Review all Settings, and Create Rule.
Your Cron has been set up.
Keep monitoring events for a few days to see if everything is in sync.
If you like this article, share it with your network, and let us know your views in the comment section below.
Drafted By,
Ishita Shah
Ishita is a DevOps Engineer by Passion and Profession, She loves to travel and believes in solving critical repetitive IT tasks by automating them.
21st March 2022