
How to create API endpoint for AWS Lambda function
AWS Lambda lets you host your code/function without worrying about server or scaling. AWS Lambda is Serverless solution, while using any AWS services, it is easy to point them to lambda function,
for an e.g.
1. scheduling lambda function to run on specific timing interval using AWS Cloudwatch rules
2. any image is uploaded to AWS S3, lambda function can create thumbnail for it.
3. creating backup of EC2 instance at timely manner using lambda function
and many more.
But to use these functionalities within AWS, you don’t need to create REST API endpoint. You can directly integrate AWS Lambda with other services.
What if you want to create webhook URL of your lambda function, or you have created API using lambda function and you need API endpoint to point from mobile or web app.
In that case, we can use AWS API Gateway to create API endpoint which will point to lambda function.
We will also see how to secure API endpoint from unnecessary traffic using Authorization Header, or you can create open API as per your use case and here, open API means
Let’s get started
Pre requisite
- AWS Account
- AWS access to create AWS Lambda function and AWS API Gateway
1. Log in to AWS Account
- Go to
Servicesand selectLambdaunderComputesection - Check and select
Regionfrom right top panel - Click on Create Function
- Select Author from scratch
- Type function name, and select
Python 3.6 or 3.8version - In permission,
Create a new role with basic Lambda permissions - Keep other settings as it is and click on Create function
2. Sample Code
Here, we are going to deploy sample python code will prints JSON as Hello World from IdenticalCloud! , Mainly because our main focus on this tutorial is how to integrate API Gateway with AWS Lambda
Copy below code in lambda_function.py file
import json

def lambda_handler(event, context):
    # TODO implement
    return {
        'statusCode': 200,
        'body': json.dumps('Hello World from IdenticalCloud!')
    }
You can change body message as per your choice
3. Add Trigger
- At left top panel, there’s an option to add a trigger, Click on Add Trigger
- In Trigger configuration, select API Gateway
- at API, select Create an API
- Select REST API
Now, comes security part, In this tutorial, we will see how to create Open API, as well as how to create authentication protected API
- For first case, select Open
- Choose API name and Deployment stage as per your requirement
- and Click on Add
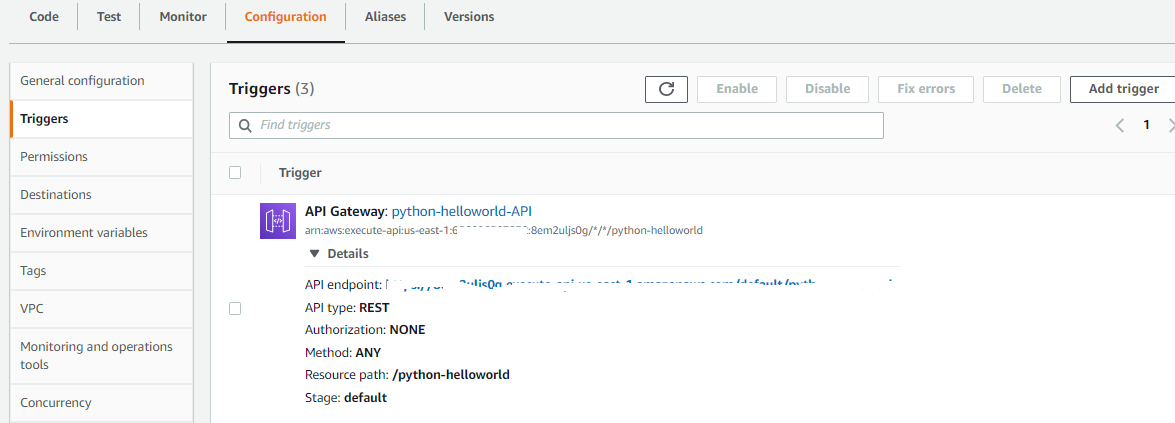
Now, as you can see screenshot attached, here you will get API endpoint which is accessible through internet. Try and run that URL in your browser and you will result as Body
To create authentication protected API
- Repeat above described steps and at Security, select API Key
- Choose API name and Deployment stage as per your requirement
- and Click on Add
- Now, at this point if you copy and paste API Gateway URL, you will receive the following error
{"message":"Forbidden"}You need authentication header to confirm that you are authrozied to use this URL
For that,
- Go to
AWS Services–> selectAPI Gateway - Select your
API Gatewayname - In left panel. locate API Keys
- Select given API Key, and click on Show button
- Copy API Key and save it in secure place
- Now, you can try running API Gateway URL with this authorization key header
to do that, use curl command or POSTMAN tool
curl -H "x-api-key:XXXXXXXXXXXXXXXXXXXXXXXXXXXXXXXXXXXXX" https://XXXXXXXX.execute-api.us-east-n-helloworldcom/1/helloworldreplace API key with your actual key and type your exact API Gateway URL
4. Done
- Setup is done, now you can go ahead and test it
Let us know in the comment section, if this article was helpful to you! Share it with your collegues and friends
Drafted On,
22nd January 2022
DevOps @identicalCloud.com
References
[1] https://docs.aws.amazon.com/apigateway/latest/developerguide/welcome.html